
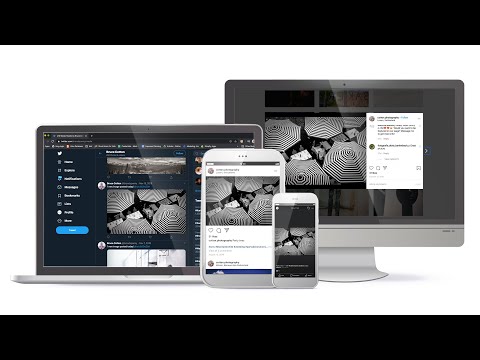
Exporting images specifically for each social media channel is the best way to ensure your images look great wherever they are posted. Exposure’s quick export presets enable you to export images in record time. Increase your exporting productivity by integrating them into your workflow.
Photos: Bruce Cotton
Transcript
Why Optimize?
Social media networks use images of specific sizes and formats. Posting images with the correct dimensions and quality will ensure the images look their best, and that they will load quickly.
The quality setting determines the final file size of JPEG images. Higher quality means less compression, resulting in a larger file size. Using the highest quality setting is tempting, but this is not the best option for sharing on social media. If the file size is too large it will be automatically recompressed by the social platform, which will not look as good as if it is done by hand.
Exporting Optimized Photos
Exposure’s Quick Export feature was designed for scenarios like this. Export profiles can be created for each social channel. This ensures you can export images quickly and that your images will always appear correctly when posted to Twitter, Facebook, etc.
To access the export profiles, press Shift+Cmd+E or Shift+Ctrl+E on Windows. You can also use the right-click menu to open the Quick Export dialog. Then select which export preset to use from the list, or several of them, and press Export. An easier way to create images for social media is to select all the images to export, then choose one of the preset recipes from the list in the right-click menu.
Creating Export Presets
Building custom quick export profiles is a simple process. Open the Preferences panel and choose the Export tab. Select the Add Export Profile button and select export presets for the destination, file naming, file settings, metadata, and image size.
Custom export presets can be created at the top of the panel.
Select the type of preset to create and then set each of the values. For example, the Destination preset sets the location where exported images are saved. Instead of updating the folder name for this preset every time, use the prompt me when exporting option. This will have Exposure open a window to manually set the location each time the preset is used.
With the new export profile established. It is now available from the Quick Export panel.


