
I enjoy doing still life photography. I particularly admire and try to recreate the style of the great masters. The subjects, composition, lighting, backgrounds, and atmosphere they created are all very appealing to me.
Before getting into this type of work, I had to learn and apply some key tools and principles:
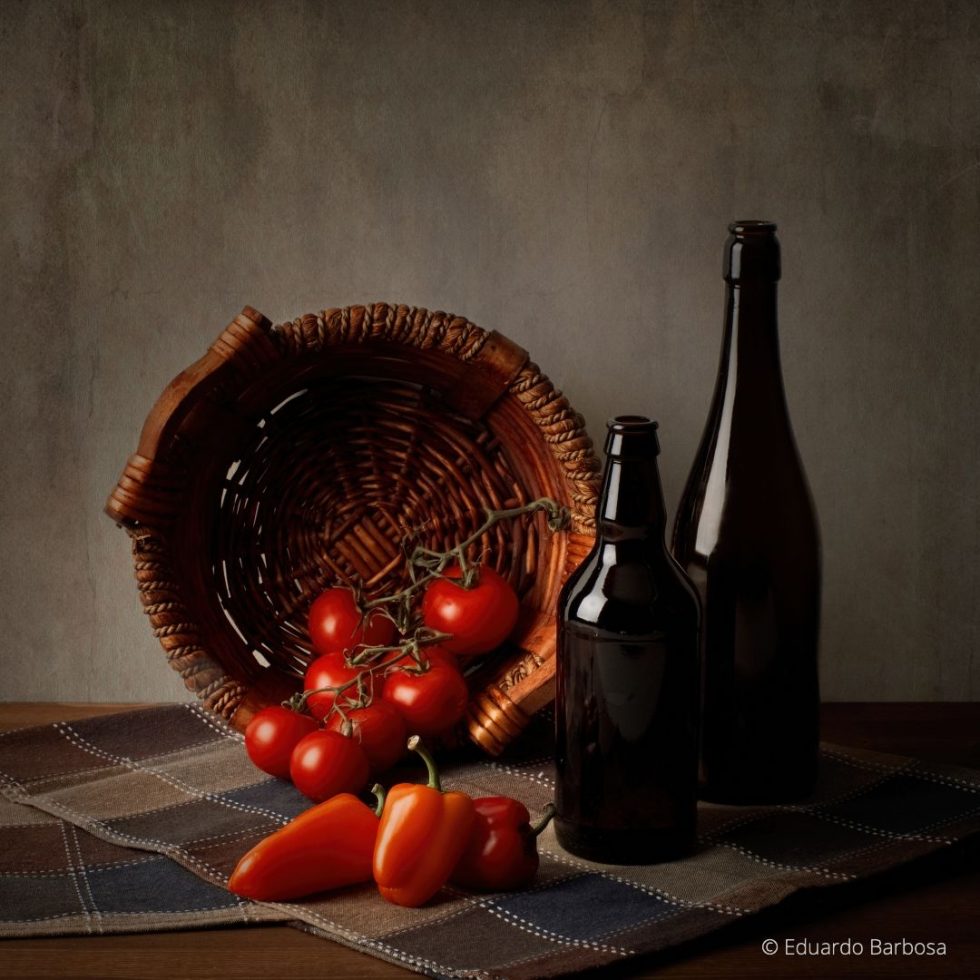
- Subjects: Using everyday home objects, fruits, vegetables with interesting shapes, textures and colors
- Composition: Simple, dynamic set-ups with harmonious shapes, sizes, colors and placement
- Lighting: Use of studio flash (wireless/tethered) with a softbox to avoid the tripod in order to get more freedom of movement and more shots out of a session
- Backgrounds: Blending textures into the background to convey the proper atmosphere, as well as trying to stay away from buying lots of fabric
- Atmosphere: Recreating the classical look of the master painters: the warmth, the small window light, the dark tones…
Exposure X4 is an excellent editing tool for this type of work, in particular for the following reasons:
- Composition and lighting: On this project, I used the tethered functionality in Exposure, and monitored the captured images in real time. As I shoot, the image appears in Exposure on my computer screen almost immediately and I can check and correct some details that I cannot evaluate well on the camera.
- Backgrounds: Using the overlay textures provided by Exposure as well as my own allows me to produce very realistic and varied backgrounds. I typically combine two or three wall textures and one or two scratch textures. I like the antique, decayed look. I place each of these textures in a separate layer for better blending control. I then apply masks as required to isolate the front elements from the background.
- Atmosphere: Exposure is unbeatable here. The older film emulations such as the Polaroids, Kodachromes, etc., render the image so warm and intimate. And, as a final touch, a soft vignette gradation helps build a nostalgic darkness.
Project and Setup
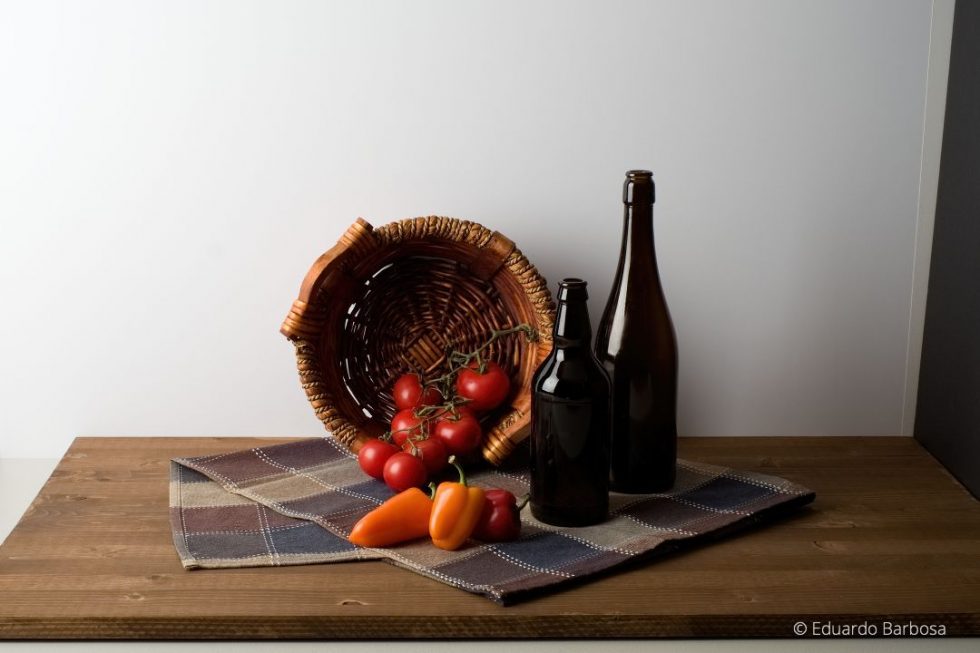
I used Exposure to monitor my photos during this tethered shoot, it was a recent project I shot for this article. Here is a list of the equipment I used.
- Fuji X-T2 paired with a Fuji XF 35mm F1.4 lens
- ISO 400 / f11 / 1/250s
- Flash meter
- Flash and large vertical softbox
- Wooden base, white background and a black panel on the right of the subject
- USB tether cable
- Fujifilm X Acquire tethering software
- Exposure X4
- Computer
My Editing Process
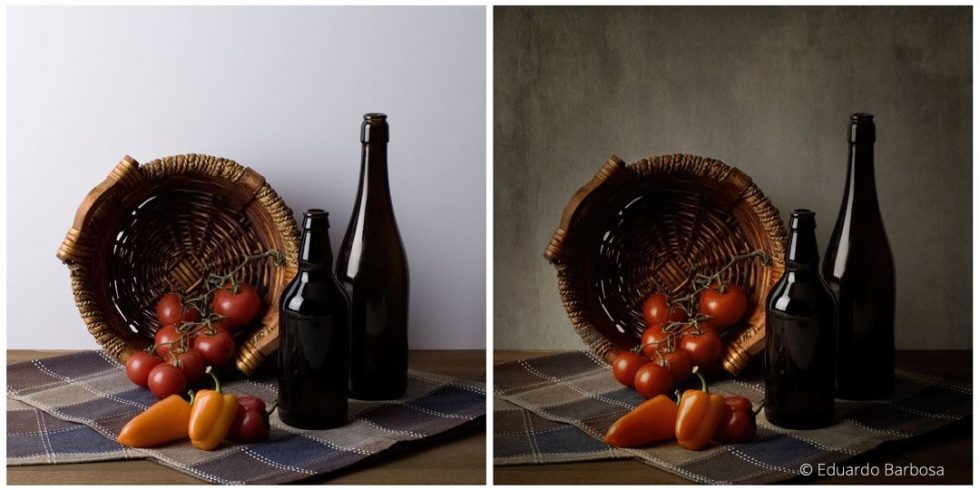
First, I selected the final RAW file from the shoot. It was a Fuji .RAF file in this case. I then used Exposure’s crop, rotate, and transform tools. I cropped the photo 1×1 and then I used the transform tools to straighten the bottles. After that, I adjusted the white balance.
Here’s how I created the look of the image using Exposure’s non-destructive layering tools:
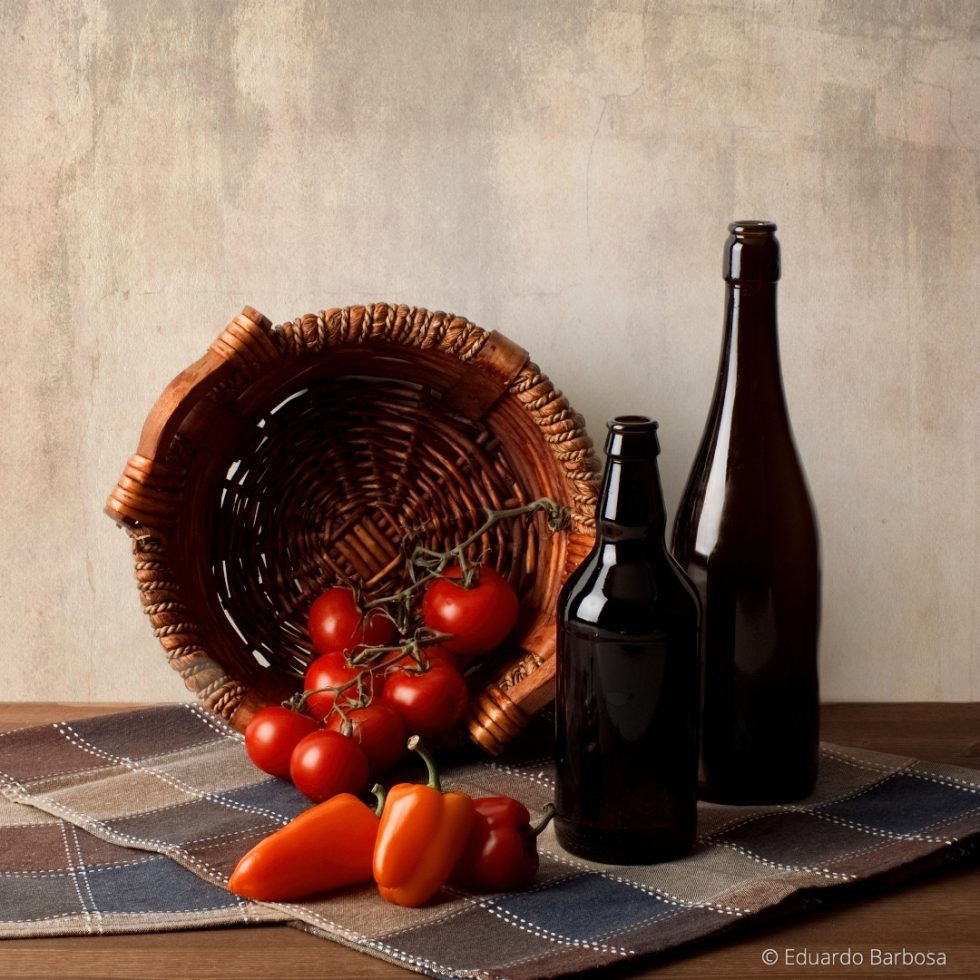
- For the first layer, I applied a Color Film preset. I decided in favor of the Kodachrome II (62-74), and kept the grain on.
- For layer two, I applied the Color Misc Effects – Saturation Increased-Warm preset. I added this to improve warmth and color intensity to the objects. I set the opacity at 40% to blend it.
- In layer three, I applied a texture overlay. I used yellowed antique paper with a layer mask so the texture only applies to the wall.
- For layer four, I applied another texture overlay. This time, I used a stained industrial floor image to add some wall intensity. I copied and pasted the layer mask from layer three.
- In layer five, I added a third texture overlay: Image Wash 1 for the decayed look. I copied and pasted the layer three mask, here.
- For layers six and seven – I applied scratches overlays 7 and 9 for additional decayed appearance. As with layers four and five, I copied and pasted the layer three mask.
- Advice on using masks for developing textures: when using several texture overlays in different layers, make sure all the texture masks are identical. This helps to create a more believable look.
- In layer eight, I applied a soft round vignette to emphasize the tomato and pepper area. I set the opacity at 81%.
- For layer nine, I applied a second vignette. This one is soft, but larger and slightly shifted to the left. This provides an overall mood and emphasizes the light direction from the left. During shooting, I placed a black panel to the right of the bottles to cut reflections and darken the right side of the image. This is further emphasized by shifting the vignette to the left.
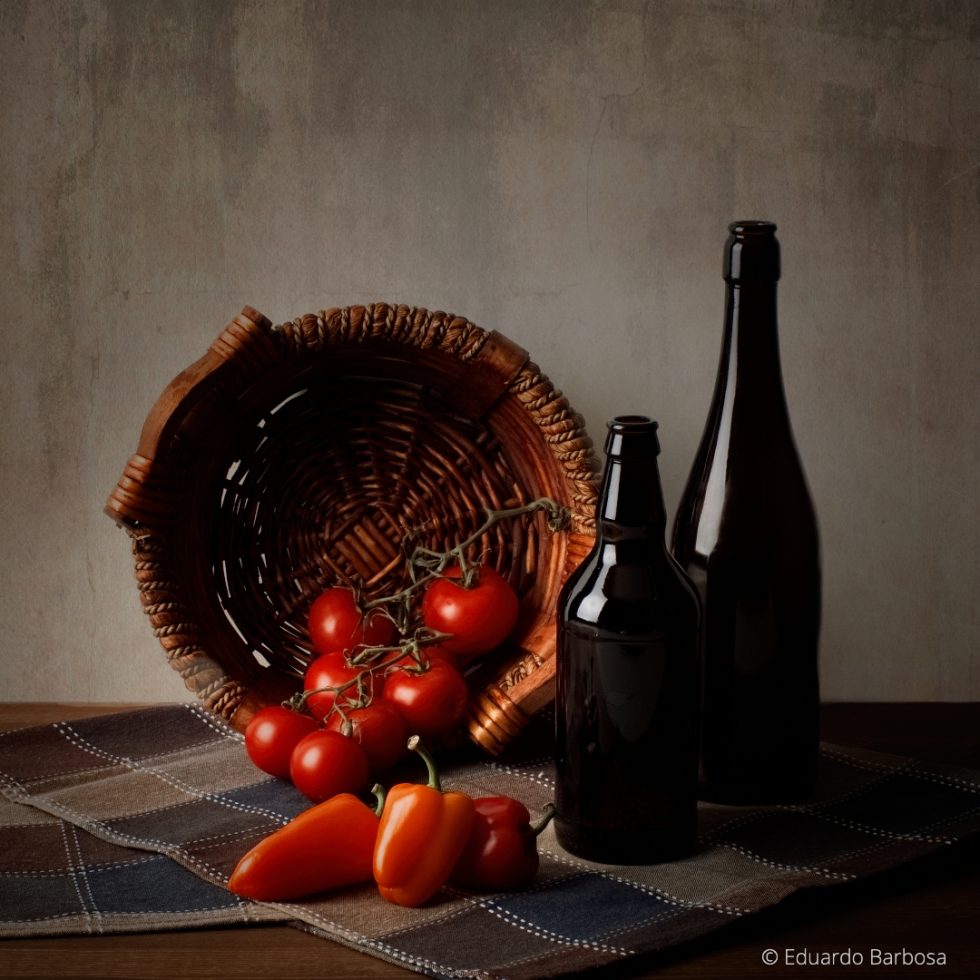
- In layer ten, I made overall light adjustments. I lowered the contrast and increased the shadows.
- For layer eleven, I applied the Color Misc Effects – Golden Hour – Orange Most preset at 18% opacity to provide a warmer feel to the whole image.
- In layer twelve, I applied the Color Focus – Soften – Diffuse Glow – Low preset to reduce the image sharpness a little.
For the final step, I evaluated the overall intensity of the processing and decided to keep it at 100% intensity.
Once my editing process was completed, I created a custom preset using the filename to save all the work I’ve done. In case of a power outage or a computer crash, I can come right back to the original RAW file and apply the user preset in one step. The final image, layers, and settings will be restored.
Conclusion
Still life photography is a very challenging and rewarding practice. You use lots of tools and if you pay close attention, you can gain a lot of knowledge.
I love the look of the old master’s style. This mood can be created in Exposure X4 from start to finish using appropriate textures, film simulations, vignetting and toning.
On this project, I used the tethering capabilities of my camera along with Exposure’s folder monitoring. That helped me see the images on the computer screen as they were captured, giving me immediate visual feedback to make adjustments as required. I highly recommend doing this when shooting still life subjects.
I hope the images and the description of these methods will be useful to you. Enjoy shooting and ‘’painting’’ in the old master’s style!
Try Exposure Today


