
Correcting Perspective and Keystone Distortion with Exposure X4
We have all experienced it at one time or another. You are walking around a city with your camera at your side and you unexpectedly see architecture that’s worthy of a capture. You point the camera upwards and press the shutter. That interesting building is probably going to look like it’s leaning backwards, and you’ll probably want to correct that effect.
This visual distortion is called keystoning, or perspective distortion, and it occurs when the camera lens is not perpendicular to the surface being captured, as when you are pointing your camera up at architecture.
This following photo in Turkey was taken looking up from the ground. I was near the pool and had to point upwards to include the pool area and the hotel in the background.

Image #1: Hotel in Turkey (Undedited)
Note that the keystoning effect can also occur when photographing the inside of a building. You want to capture as much of the architecture as possible, and while looking down you might find that the image is leaning forward, rather than backwards, as in the first example.
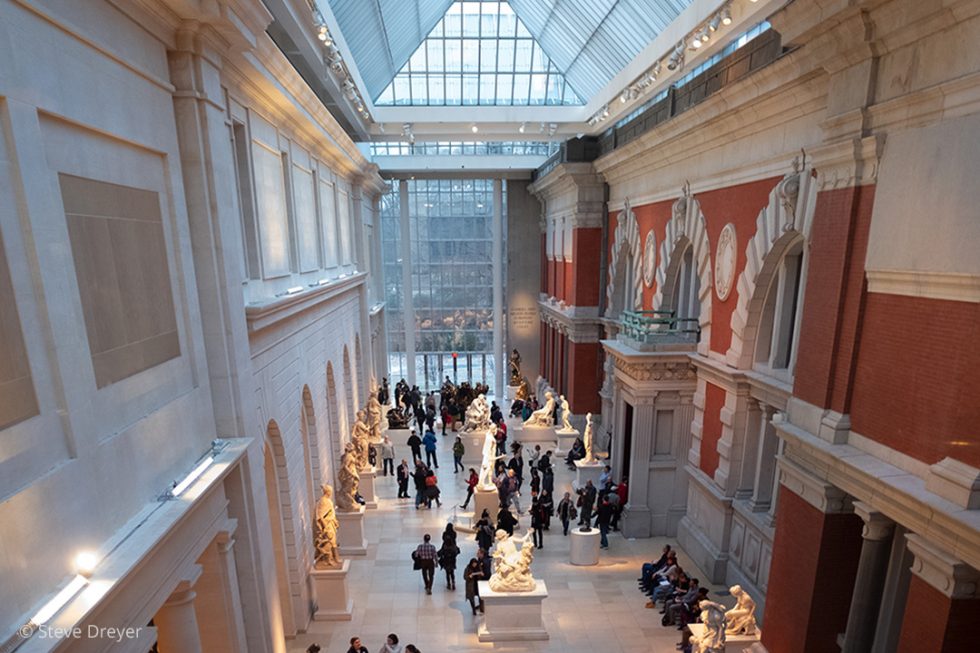
Image #2: Metropolitan Museum of Art (Undedited)
I should mention that there might be times when we will prefer keystoning for a certain artistic effect. But in general we want to correct it, and this article addresses how we can use Alien Skin Exposure X4 to do so.
The images shown in this article were captured with my Fujifilm equipment (X100 series, and XPro2). I use Exposure in my workflow because it processes RAW and JPG files beautifully, has film simulation presets and adjustment sliders, and a feature set that is easy and effective to use. I discussed Exposure and my workflow in an article for FujiLove’s October 2018 Magazine and in a follow-on website article with my step-by-step Exposure process for the images in the magazine.
Post-Processing with Exposure X4
The remainder of this article describes how I used Exposure to correct the two images shown above. I’ll also show the final edits, which include additional stylistic edits that I made in Exposure.
Image #1: Hotel in Turkey
I visited Cappadocia, an area in Turkey that’s known for its interesting and incredibly unique rock formations. At the end of the trip, I stayed at a hotel that has man-made versions of those formations circling the pool area.
The original photo had several complex problems to solve, which might normally result in my deleting the image without spending the time to fix it. You can see in the original image that the buildings are slanting backwards. As mentioned, this is the type of keystoning that occurs when the camera lens is not perpendicular to the structure and you are looking up to capture the image.
I opened the image in Exposure and made some initial edits. I first opened the Presets panel in the left side of the interface and selected the Fujifilm Velvia film simulation, as it adds some punch to the image. I also adjusted several sliders to the Basic and Detail panels on the right side of the interface (Figure 1) as I wanted to increase the exposure and adjust the contrast, clarity, and sharpness. In addition, the Shadow slider “opened up” the image to a more pleasing result.
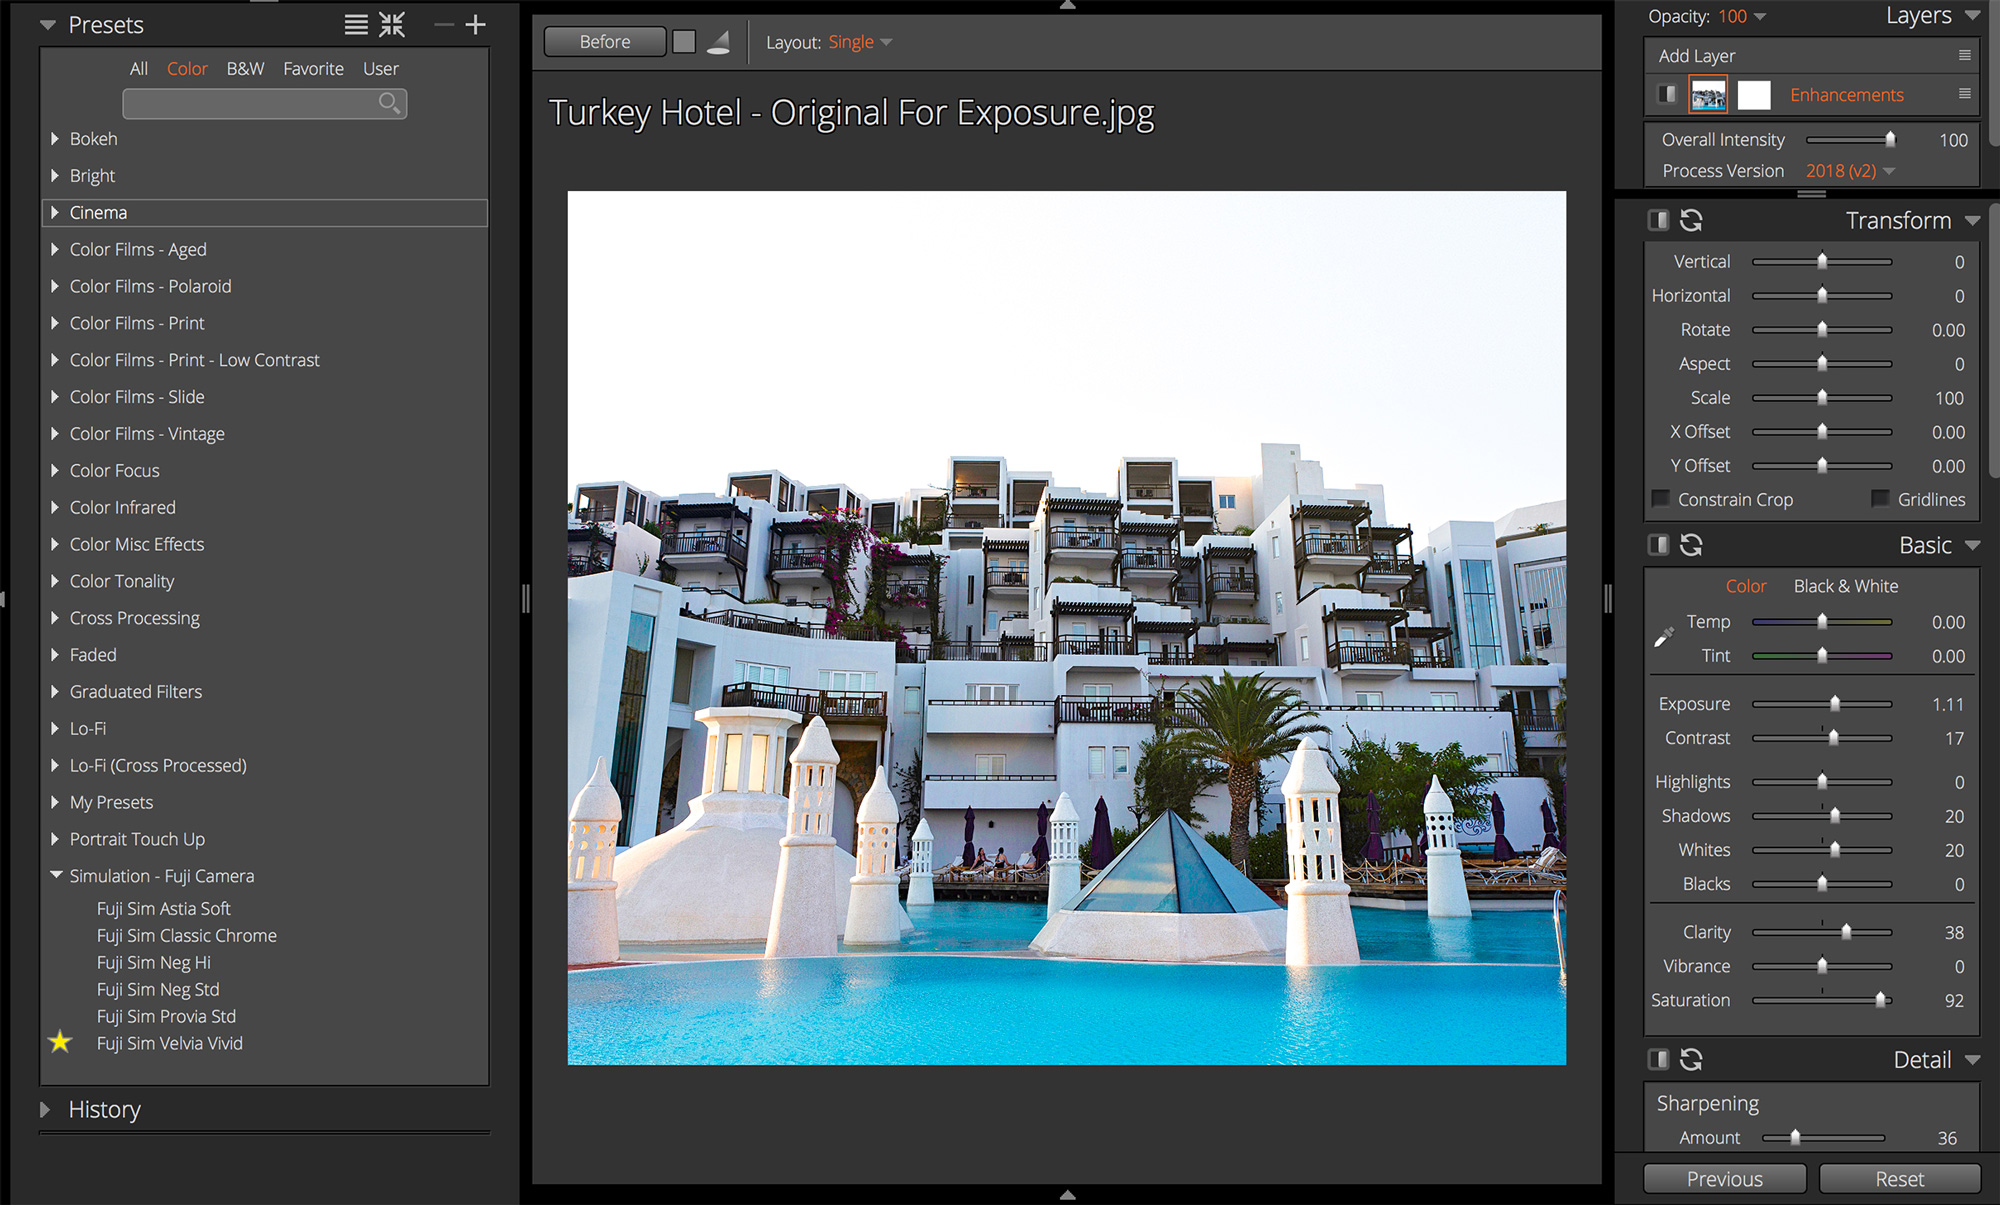
Figure 1 – Image in Exposure, after selecting the Fujifilm Velvia film preset and making adjustments in the Basic and Detail panels. Click image for larger view.
Exposure X4 makes it easy to adjust for the optical distortion that I described earlier. As shown in Figure 1, the Transform panel on the right side of the interface has the controls for doing so.
The Vertical slider corrects keystoning by bringing the image forward or backward. For this image, I moved the slider to the left because the top of the buildings were leaning backwards. I checked the Gridlines box to see reference lines that I could use as a guide to make sure that the tops of the buildings would be level as I moved the slider. This step usually results in extra space around portions of the image (Figure 2). The extra space is filled when you check the Constrain Crop box (Figure 3).
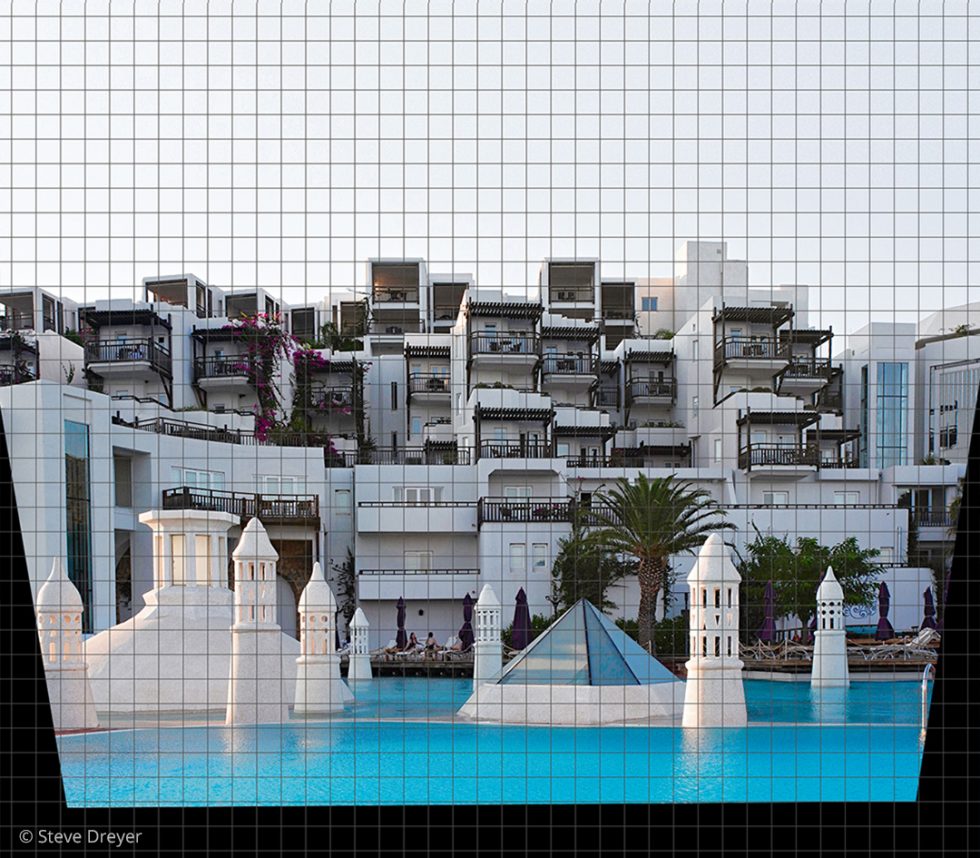
Figure 2 – Image with gridlines after the vertical adjustment
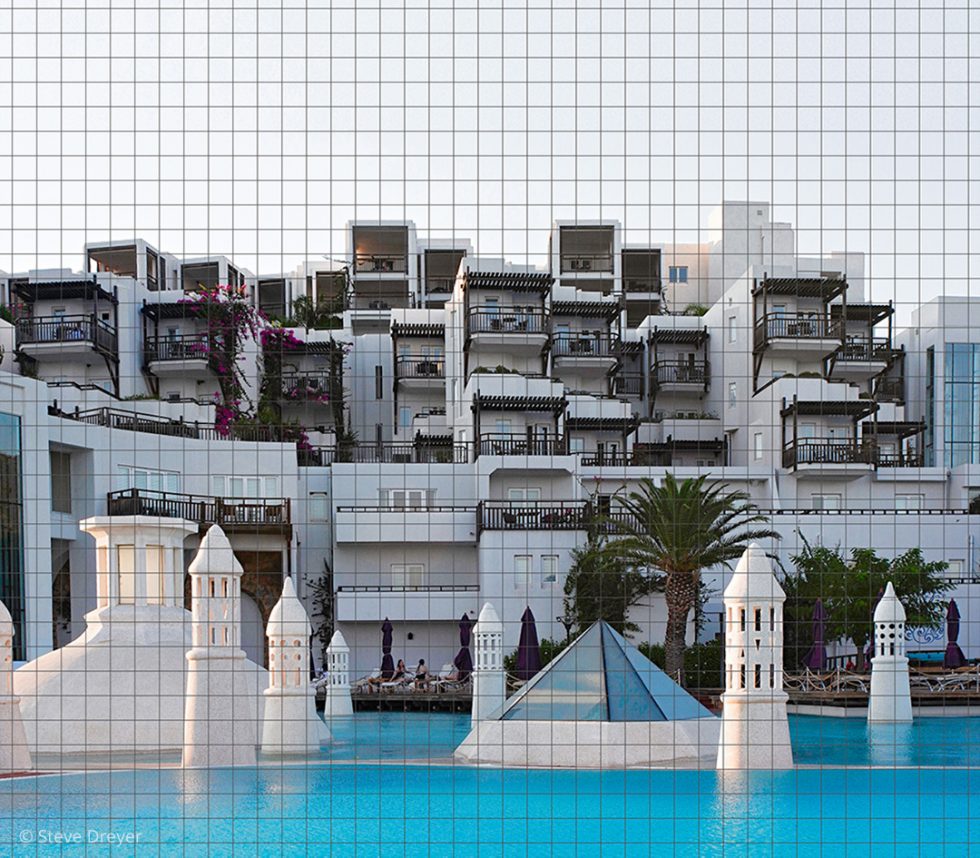
Figure 3 – Image with gridlines after checking the Constrain Crop box
As you can see, there’s a small amount of cropping that took place. I accounted for this possibility by taking a slightly wider shot when composing the image in the viewfinder.
I made additional minor adjustments using the Transform Panel, as follows:
Using the Vertical slider can sometimes widen or make some portions of the image taller than they were in the original photo. I used the Aspect slider to make the necessary changes to the formations and other parts of the image.
I made a slight adjustment to the Rotate slider to level the image, and changed the Scale slider to fill the frame and eliminate parts of the image that I didn’t want to see. After making those adjustments, I finished the image with changes to the Y Offset and the X Offset sliders for positioning the image within the frame.
I moved the Y Offset slider to the left in order to shift the image upward (eliminating part of the sky) and to view more of the deep blue colored pool in the foreground. However, as Figure 4 shows, the left side of the photo was cut off in a bad spot. So I used the X Offset slider to shift the photo to the right for the final composition (Figure 5).
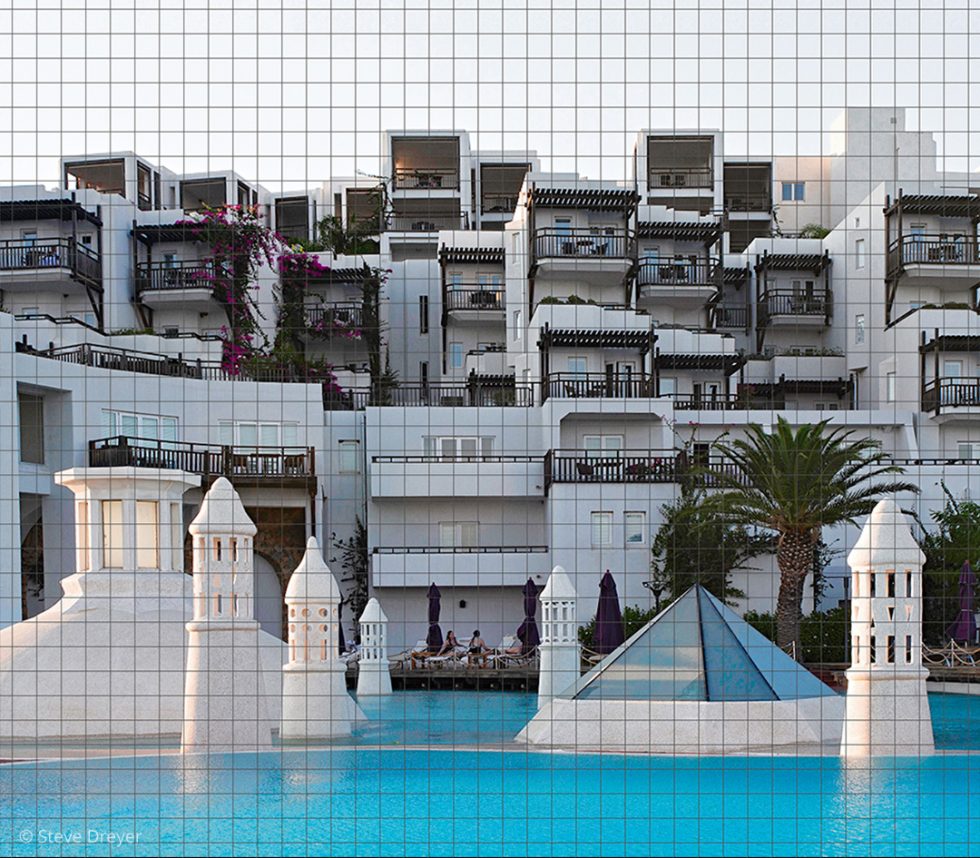
Figure 4 – Image shifted up in the frame with the Y Offset

Figure 5 – Final image after shifting left with the X Offset (without gridlines)
All Transform panel sliders and their values are shown in Figure 6.
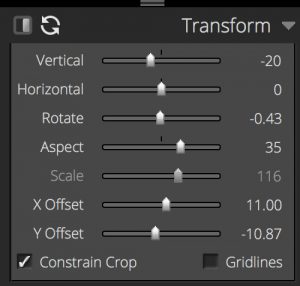
Figure 6 – Completed Transform Panel
Here’s a before and after for the image. It’s quite a dramatic improvement!
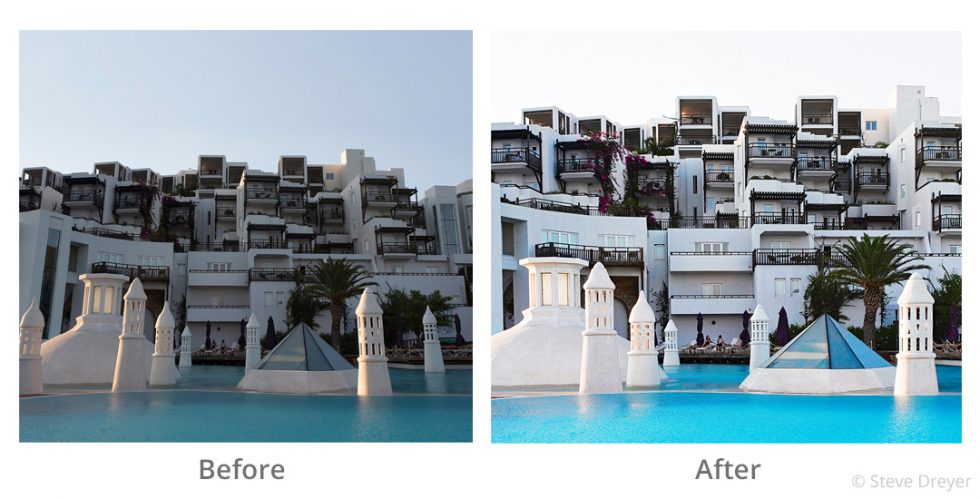
Image #2: The Metropolitan Museum of Art
The Transform panel and other image enhancement adjustments worked really well to correct the optical distortion in an image that was shot by looking up at architecture.
I decided to test the tool’s capabilities with a visit to the beautiful Metropolitan Museum of Art in New York City. I was standing on the second floor, looking down at the many visitors who were on the first floor. As you can see in Figure 7, pressing the shutter resulted in an image that appears to lean forward, rather than away from me, as in the image of the hotel in Turkey.
Figure 7 – The Metropolitan Museum of Art (Unedited)
Exposure made it really easy to correct this photo. In this case, the Vertical slider is pushed to the right instead of to the left, so that the top of the image is sent back, rather than forward.
Figure 8 shows the adjustments to the original image. I made changes in the Transform Panel to adjust for the perspective distortion. I also added a layer (upper right) and enhanced the image in the Basic and Detail Panel. The final image is shown in Figure 9.
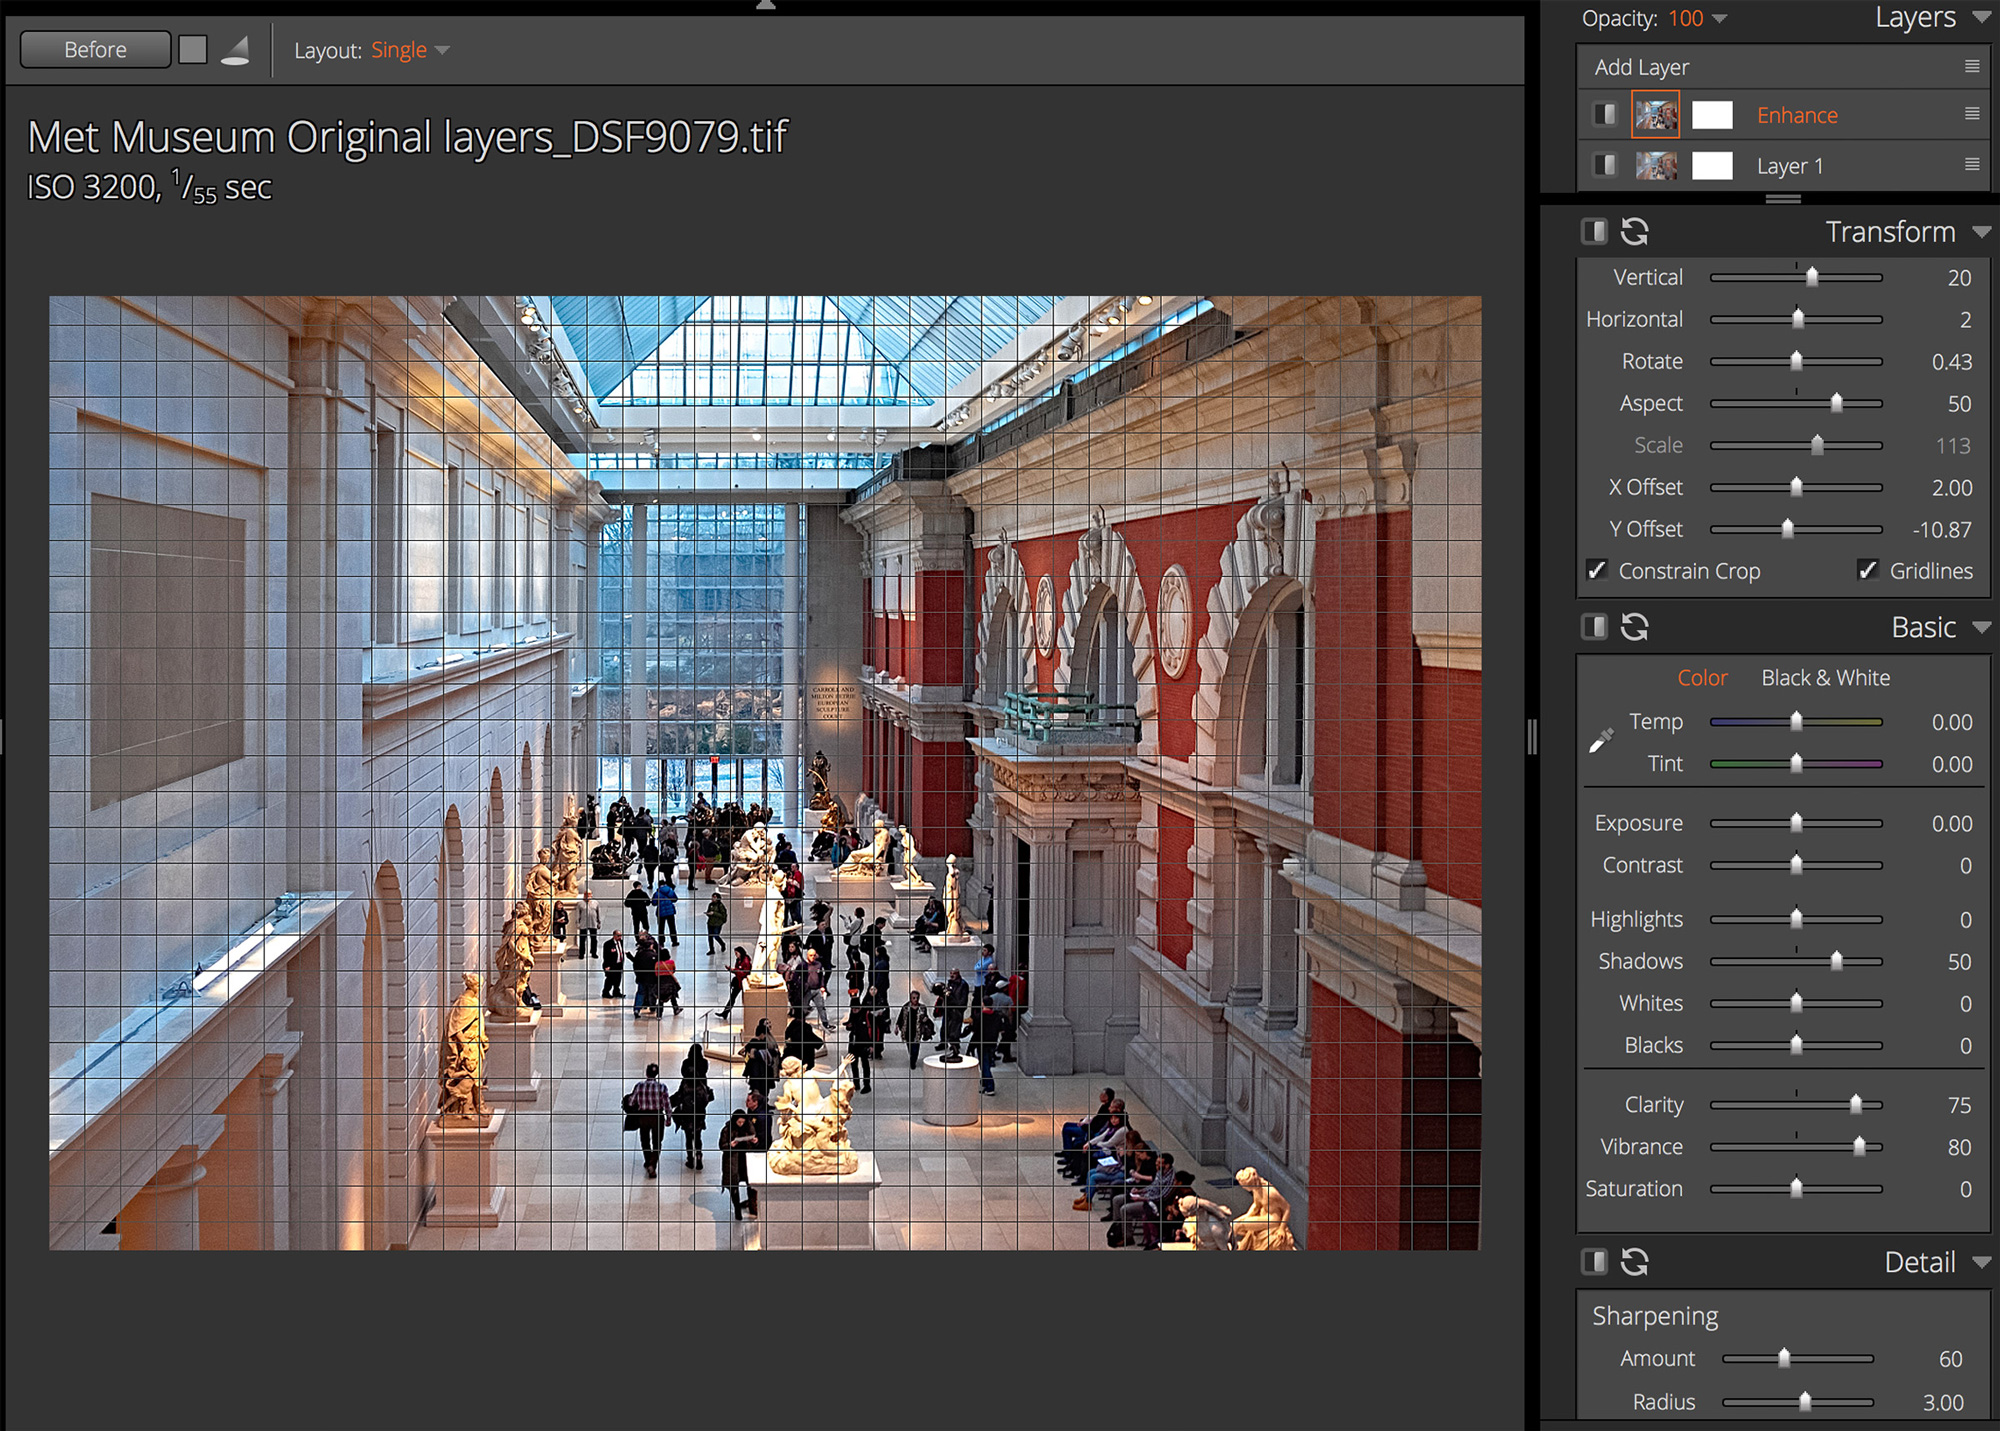
Figure 8 – The Metropolitan Museum of Art (adjustments to panel sliders). Click image to view larger.
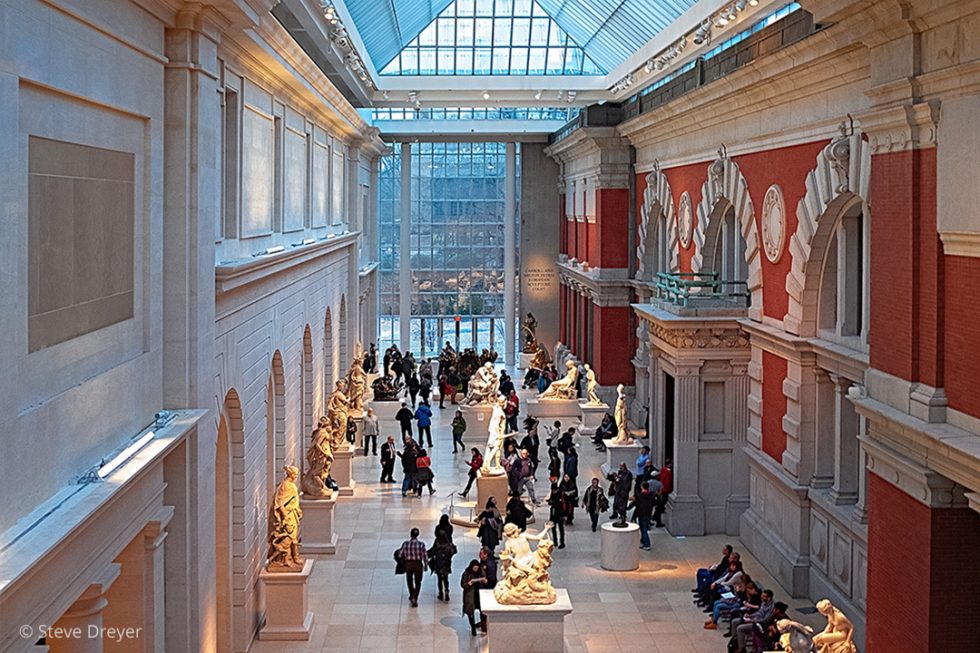
Figure 9 – The Metropolitan Museum of Art (final, after editing)
Summary
I hope these two image examples and the accompanying information about how to use Exposure X4’s Transform tools will help you solve optical distortion issues that you may have when photographing architecture. I’d recommend trying the above techniques if you already have Exposure X4 or if you are currently using the free trial.
Exposure is one of those products that you can use out of the box and without a long learning curve to take advantage of its robust feature set. Perspective correction is just one of its many excellent features. You might need to use several different products to have the complete toolset found in Exposure alone. In addition to Exposure doing a great job processing RAW files, it has the file management functionality and enhancement adjustments of products like Lightroom, and provides layers and masking typically used in Photoshop. I would suggest giving it a try if you haven’t already done so.
Try Exposure Today


Hello Steve,
Thank you for sharing on those key features. I would have a couple questions if you don’t mind.
I find that the rotation sliders step to coarse, i cannot really tune to the exact degree i need with it. So I have to key in manually the rotation until i get it exactly as I want. Any tip to easily fine tune the rotation just using the slider?
Another question on distortion, is Exposure 4 able to automatically correct the distortion of a Raw based on the associated in-camera Jpeg if I keep them in the same folder?
I have not been able to find this feature.
Thank you for your time.
Emmanuel
Thanks for commenting, Emmanuel. When a control is active in Exposure, you can use the up and down arrow keys to make adjustments to the slider. If you adjust the Rotate slider, for example, you can then adjust the image rotation with the keyboard. You can hold down the modifier key Alt/Option to fine tune the rotation with each press.
Exposure has auto distortion correction for our list of supported lenses. https://www.alienskin.com/exposure/supported-lenses/ to the complete list.