
Introduction
If you’re a landscape photography enthusiast and you’re looking to improve your post-production process, it’s definitely worth experimenting with Alien Skin’s Exposure X3 software. This award-winning, non-destructive RAW editing platform is a wonderful solution to many post-production problems very specific to the landscape photographer’s workflow.
From accommodating unflattering sunlight to emphasizing your capture of natural colors, below we share five Exposure-specific editing tips that every landscape photographer needs to incorporate in a seamless routine:
Color Grading
If you’re ever editing a landscape shot rich with orange or blue shades, we highly recommend that you experiment with Exposure’s Technicolor Process Preset. Let’s say for example you’ve taken a really picturesque shot of your local waterfront at golden hour, and you’re hoping to make some adjustments to emphasize those lovely orange sundown hues as well as the impressive, cool blues of the water.
Once you’ve applied the Technicolor Process Preset, from there it should be really easy to make your own custom edits that will especially accentuate those particular shades. Playing with orange and teal color adjustments is an extremely popular compositional edit. Not only does it add impressive depth to your image, it helps add richer color to your shadows as well as highlights to those beautiful, brighter oranges we mentioned above. The granular color grading you’ll apply here is naturally subjective depending on the original photo you’re working with as well as your unique aesthetic as an artist.
When applying these edits, keep in mind a few of the following things: first, as we mentioned before, original images that include natural elements of orange and blue are the most effective shots to use for this effect. Second, RAW photos are ideal templates for your editing here — that higher quality natural color information within your RAW photo will make for a better final effect in the end. And finally, try to keep in mind which channels of your digital camera lend themselves to a higher level of noise.
Unfamiliar with what we mean by channel? Essentially, all digital images with color are made up of tons of pixels, and those pixels are all made up of different primary color combinations. A channel then refers to the grayscale image of the same size as a color image, made up of only one of those primary colors. For example, an image from a standard digital camera will have a red, green and blue channel. When it comes to noise, green and blue channels in digital cameras tend to contain much more noise by nature than red channels, especially when you start applying effects in the post-production phase. So depending on your original image, be aware of that when making your adjustments here and be cautious of that potential for excessive noise.
Local Adjustments
When it comes time for you to make all those little multifaceted tweaks in your post-production process, we highly recommend that you get in the habit of working in multiple layers. This is really a best editing practice in general as it allows you to experiment with a multitude of different adjustments back to back without affecting any prior edits.
For example, let’s say you’ve captured a compelling shot of a flock of seagulls taking off in flight from a rocky oceanfront jetty. You’ve got some frothy waves crashing ashore in one part of the image, and a number of birds in the shot as well. Maybe in one layer, you want to whiten the look of the birds’ feathers. Or maybe in another, you want to apply a specific preset effect to the splashing waves. With Exposure’s powerful editing tools, you’re able to apply any number of Exposure’s presets to whichever precise locations in your image that you’d like.
Essentially, using Exposure’s brush tools, you are able to “brush” smaller local adjustments onto whatever part of the image you’re looking to edit. You can also adjust the size of your brush depending on the scale of the edits you’re making, then use Exposure’s keyboard shortcuts to toggle back and forth between brush sizes as you work. After brushing, you can then blend any of those brushed adjustments to apply them more smoothly.
So to refer back to our original example, we recommend that you start with a new layer to brush on edits to the birds. Once you’ve finished and want to start brushing adjustments onto the waves, make a new layer before you begin adding those changes. That way, if you’re unhappy with how the wave edits turned out, you’ll still have an untouched layer that includes the edits to the birds, without the added edits to the waves that you’ve decided you’re unhappy with the results of.
Side-by-Side View
If you’re new to the post-production process altogether and you want to familiarize yourself with some popular presets to get a better idea of your aesthetic preference, we highly recommend you work in Exposure’s convenient side-by-side view. With this dashboard layout, you can apply a number of different presets to your original photo and then view all preset edits side by side to see which style works best for you to achieve whatever specific look you’re going for.
Sometimes when we’re working in post-production and we create several different versions of the same image, it can be tricky to choose our “winning” edit from this series when we’re forced to scroll from one image to the next individually (or to look at tiny, zoomed-out thumbnails side by side).
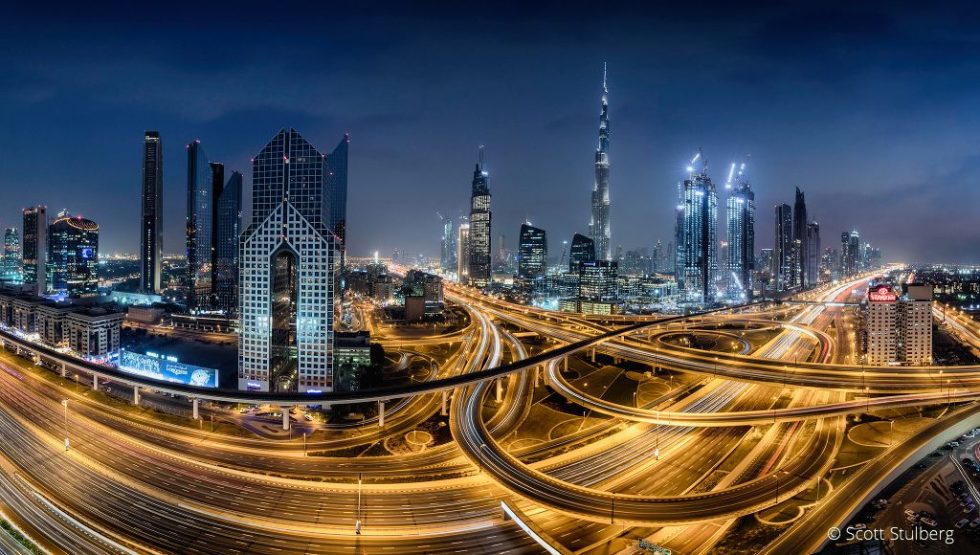
Let’s say you’re editing a very wide angle panoramic shot of a mountainous landscape. Switch into side-by-side view, then switch into the horizontal comparison mode. Now you can look at your image with a variation of presets applied, one on top of the other without having to squint at tiny thumbnails.
Virtual Copies
When it comes to editing the perfect, most compelling landscape shot in any post-production software, most pros will tell you that finding the perfect shot comes down to a lot of tedious trial and error. Just as we mentioned above, often when working in post-production, our creative process involves making a number of edits, all in entirely different styles, using a number of different presets. From there we have the freedom to make comparisons, narrow down our results, and chose a winning image from the series.
However, many students of our landscape photography course who work with more traditional photo-editing software often complain about issues of eating up storage on their hard drives when trying out and saving a number of different edits to the same original image. Thanks to the virtual copies feature offered by Exposure, you’ll no longer face this cumbersome storage issue.
With virtual copies, you can make as many copies of your original photo as you’d like, without your duplicates resulting in additional files being created and subsequently stored on your hard drive. Instead, Exposure stores these copies for you in the metadata of the original master photo.
If you’re editing one of your images and you’d like to save a copy of it with whatever edits you’ve added thus far, and then continue experimenting with additional edits in a second copy, simply right-click the image you’ve created, then click “create virtual copy.” Exposure will prompt you with the name “Copy 1” for your image, but to help keep your workflow organized, we recommend you assign images more specific names to differentiate things like which preset you’re using or which additional edits you’ve applied.
Once you’ve renamed your copy and you’ve began adding additional tweaks, if at any point you’d like to save a copy of that image including your tweaks before continuing to make supplementary changes, you can feel free to do so without worrying about taking up space.
Vignettes
The last piece of advice we highly recommend that landscape photographers heed when making edits in Exposure is to take advantage of vignettes.
Specifically, this edit can be an extremely helpful one to execute in any shot that features compelling leading lines worth emphasizing. Let’s say you’ve taken a really superb photo of a long fishing wharf leading out into the ocean at your local beach. By adding a subtle vignette to this shot, you can give this image a wonderful sense of depth that shots like this are extremely receptive to.
By using a vignette as a tool to adjust the strength of any natural light shining on either side of your leading lines, you’re able to create more balance and symmetry, effectively helping to accentuate the emphasis of the lines, leading your viewer to take in a more powerful vanishing point on the horizon. To guide the eye most effectively, simply be sure to center the midpoint of your vignette right at that vanishing point.
A common mistake we notice amateurs make when applying many edits, especially with vignettes, is overdoing it. For the best, most natural-looking effect, you want to add a very subtle vignette that plays with natural lighting just enough to provide some additional emphasis, but not too much as to distract the viewer altogether.
Conclusion
At the end of the day, whether you’re experimenting with presets or applying any of the concepts we outlined above, the best way to master any photo editing software is to simply take the time to exercise trial and error of all the techniques available to you. In doing this, you’ll have the best, most hands-on opportunity to uncover and realize your preferred routine, all the while getting to know more clearly the aesthetic look and feel that will soon become characteristic to the images you produce as a unique artist. Visit Alien Skin’s tutorial page and choose from the video selections to learn specifics for editing and organizing images with Exposure.
Try Exposure Today


Thank you, Michelle, for a very helpful article!