
Photographer and Instructor April Milani has been making beautiful artworks for years. April is a longstanding active member of our social media channels and groups. We’re always excited to see her creative works. She shared a gorgeous composite image in our Exposure users group recently. We reached out to her to learn about how she made it.
In the article below, April takes you through her workflow for how she edited this shot using photo overlays in Exposure.
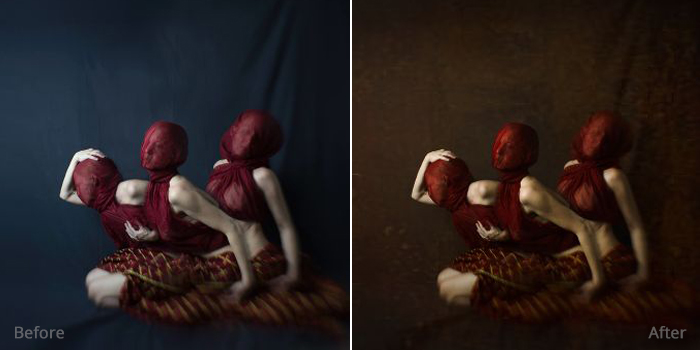
April transformed her photo into a work of art using Exposure’s texture overlays, brushing, and layers. All images in this article © April Milani.
April’s Exposure X2 Layering Workflow
I love this software! It helps me turn my creative dreams into reality. I was able to do all my creative editing for this image only in Exposure. I have always enjoyed developing and editing my photos, so I do it to the fullest. I love to take my images into new imaginative places.
I composited three photos from the shoot using Photoshop. I then opened the image in Exposure, where I did all the fun creative stuff. I wanted to use the new layers panel in the Exposure X2 Advanced Layers Update.

April simply used a black sheet as a backdrop for this composite.
Step 1: Remove color cast
I love Exposure’s texture overlays, there are so many great options to choose from. My goal is to have the texture read clearly in this image. To help it be more clear, I will first remove the color tint on the backdrop.
The color saturation controls are located on the Color panel. Notice the backdrop in the before shot above has a little blue and cyan to it. I will selectively desaturate those two colors using the color saturation controls until the color cast disappears and the backdrop looks grey.
While working in the Color panel, I also bring down the saturation of the headwrap with the Magenta slider. And I subtly lower the saturation in the highlights.
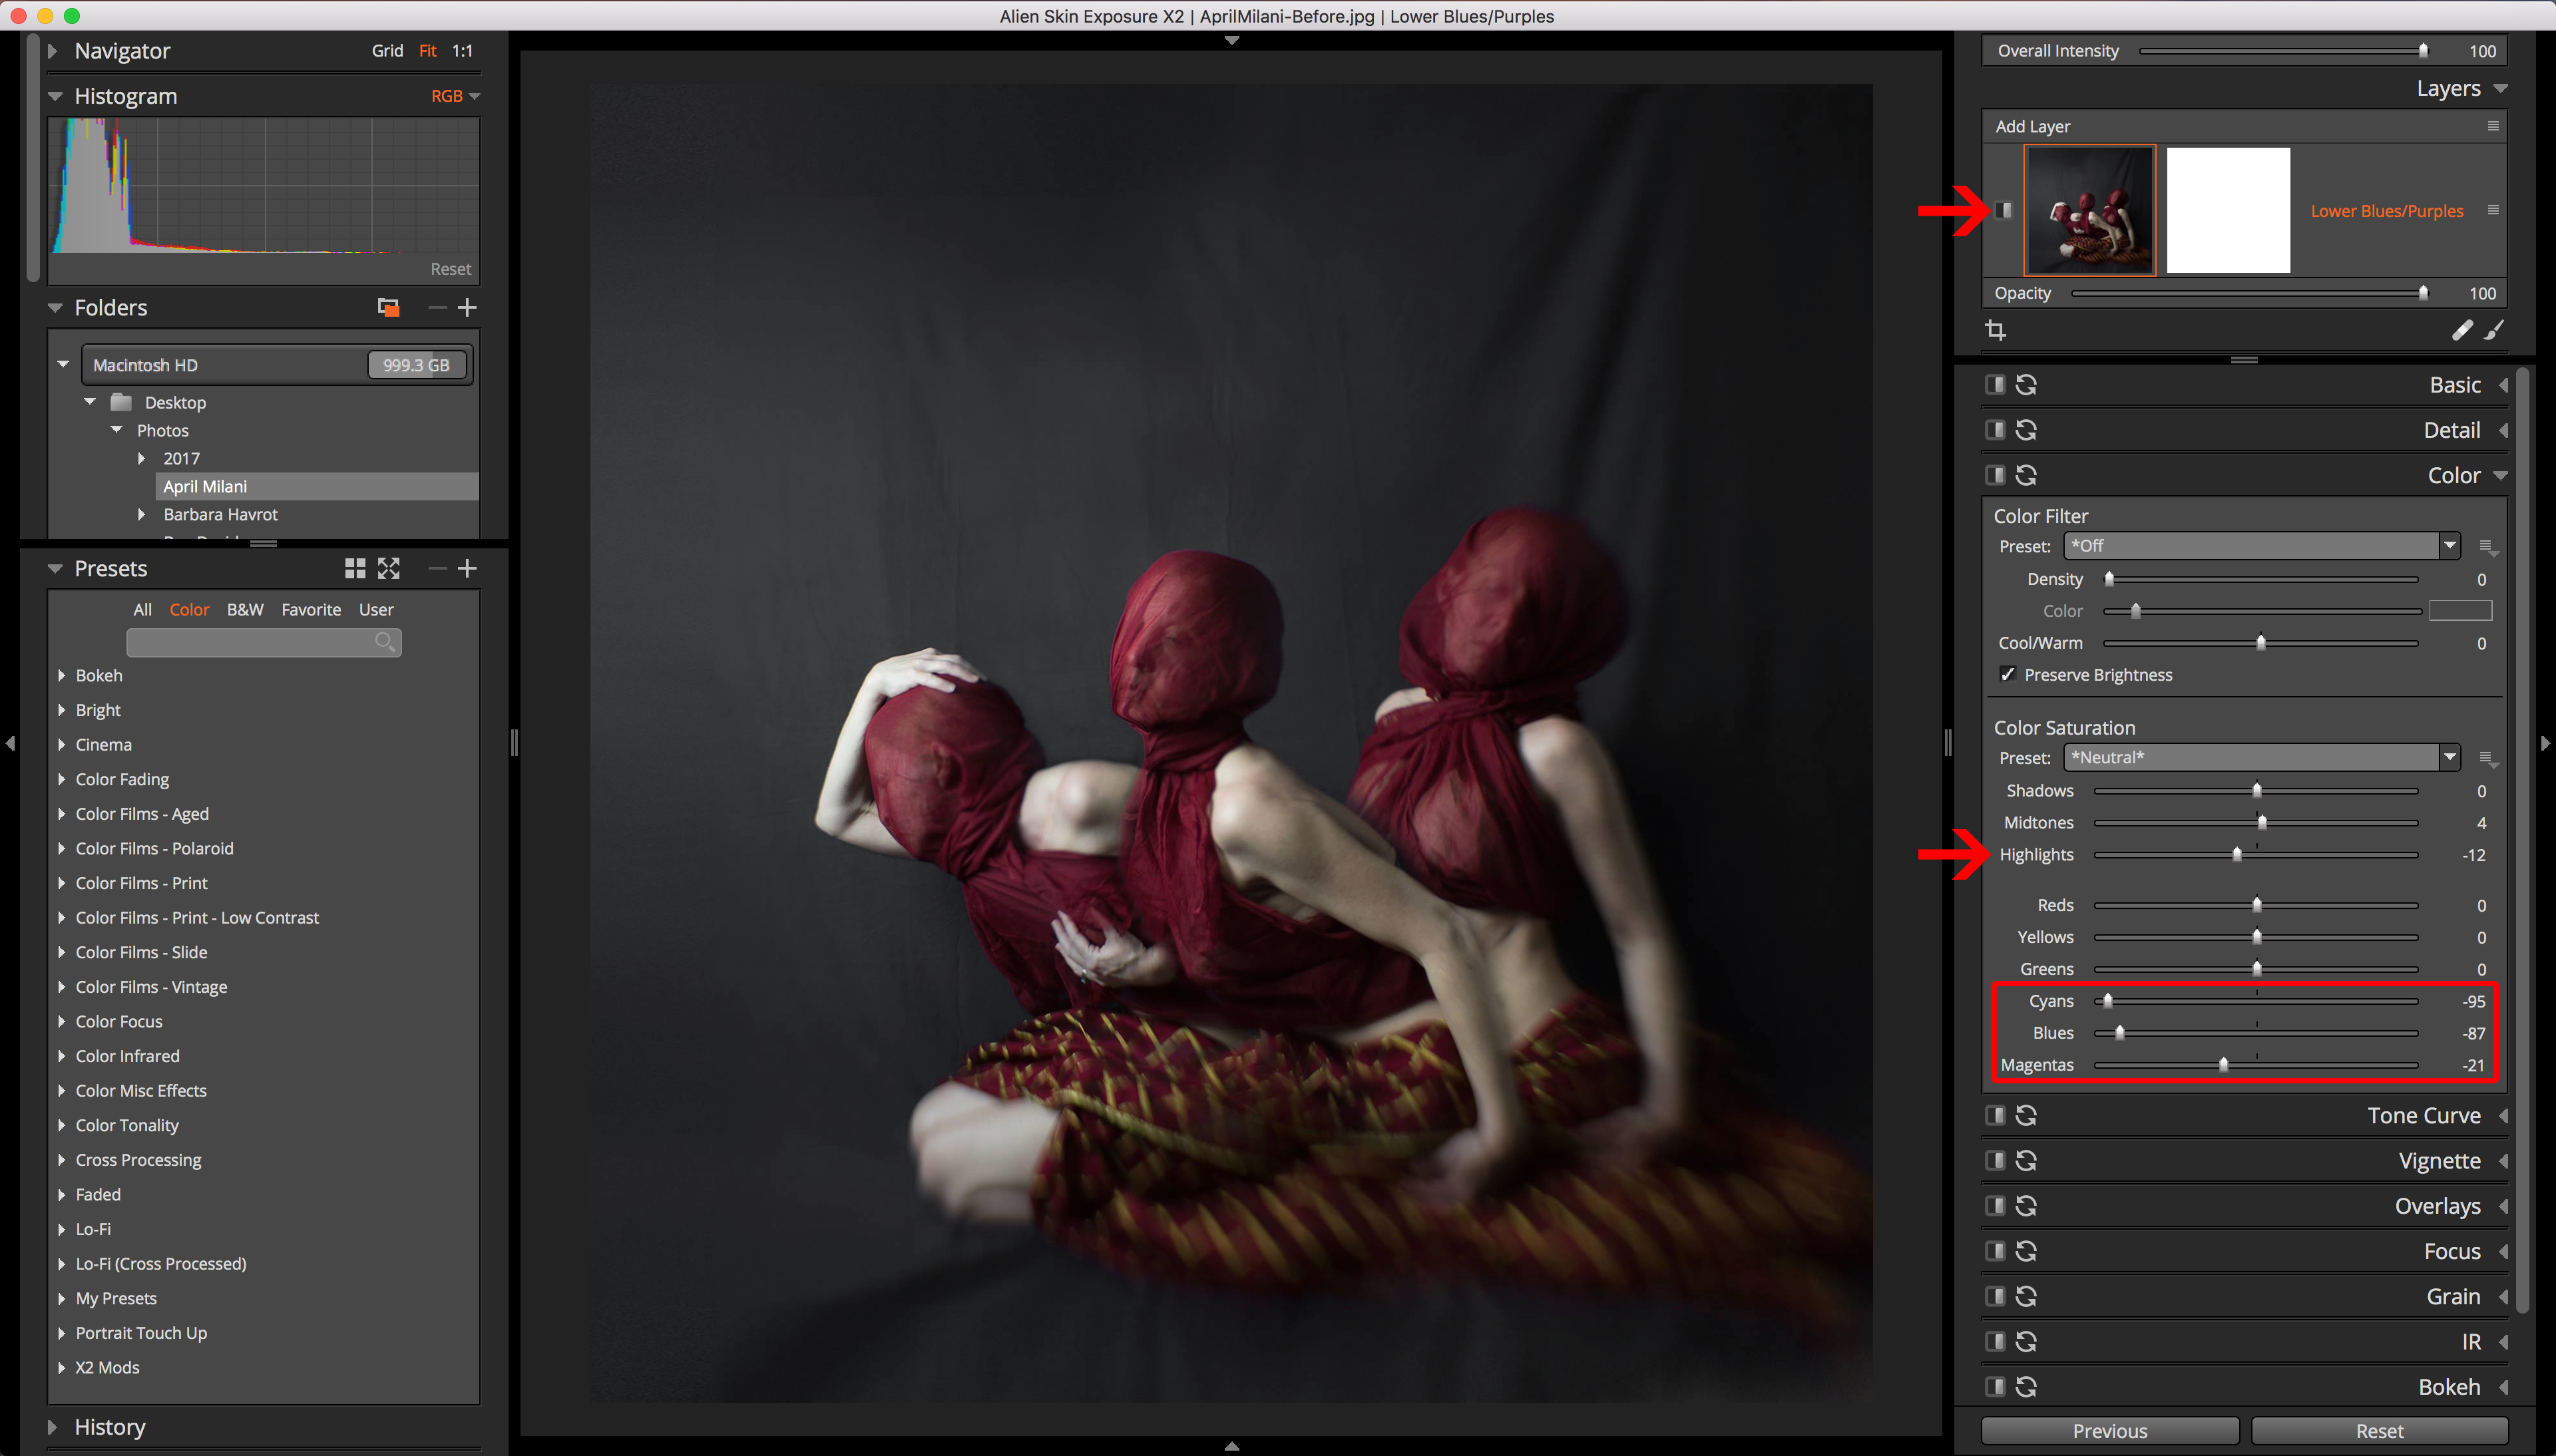
Desaturate colors selectively using the Color panel. Click image to view the settings at a larger size.
Step 2: Add photo overlay for texture
Next I want to add a texture overlay. I will put this effect on its own layer, because I want to mask the texture off of the subject. At the top of the Layers panel, I’ll click Add Layer.
On the Overlays panel, I’ll add the Image Wash 30 texture, which is one of my favorites. On the Overlays panel, I will turn the Opacity of the texture all the way up. I do this so that I can more clearly see where the photo overlay is shown. I will adjust it to work with the image after I finish masking.
Before masking the texture off of the subjects, I’ll use the protect location slider to subtly protect the center of the subjects. Then I’ll use brushing to remove texture from skin.
When I’m brushing a mask, I like to start with a high Flow and low Feather brush to quickly rough in the selection. This lets me clearly see where I have masked and where I haven’t. After I have it blocked in, I’ll zoom in and use a lower Flow brush with Feather set to 100 to clean up the edges.
To make the texture blend more believably, I set the brush to a low Flow amount and subtly remove some of the texture from the shadow areas. I find this technique gives me more of a believable edge to the effect. I don’t like the look of a stark line, so I will use more blending to smooth the transition.
As a final step, I slowly lower the layer Opacity to blend the texture with the backdrop.

April uses Exposure’s overlays to give her photos beautiful texture. She controls the placement of the effect with brushing. Click image to view the settings at a larger size.
Step 3: Add Kodachrome look
One of the best parts of using Exposure for my creative workflow is that I have everything at my fingertips. There is always a preset that works perfectly for every mood and every location. For this image I want to add an old world feel, so I’ll look through the presets in the Color Films – Vintage category.
The Kodachrome 35mm preset – Skin Tone (warm) looks good to my eyes. The yellow brown toning intensifies the red tones in the cowl, making it more blood red rather than magenta.
As a final step I’ll lower the Exposure slider to make it dark and moody.
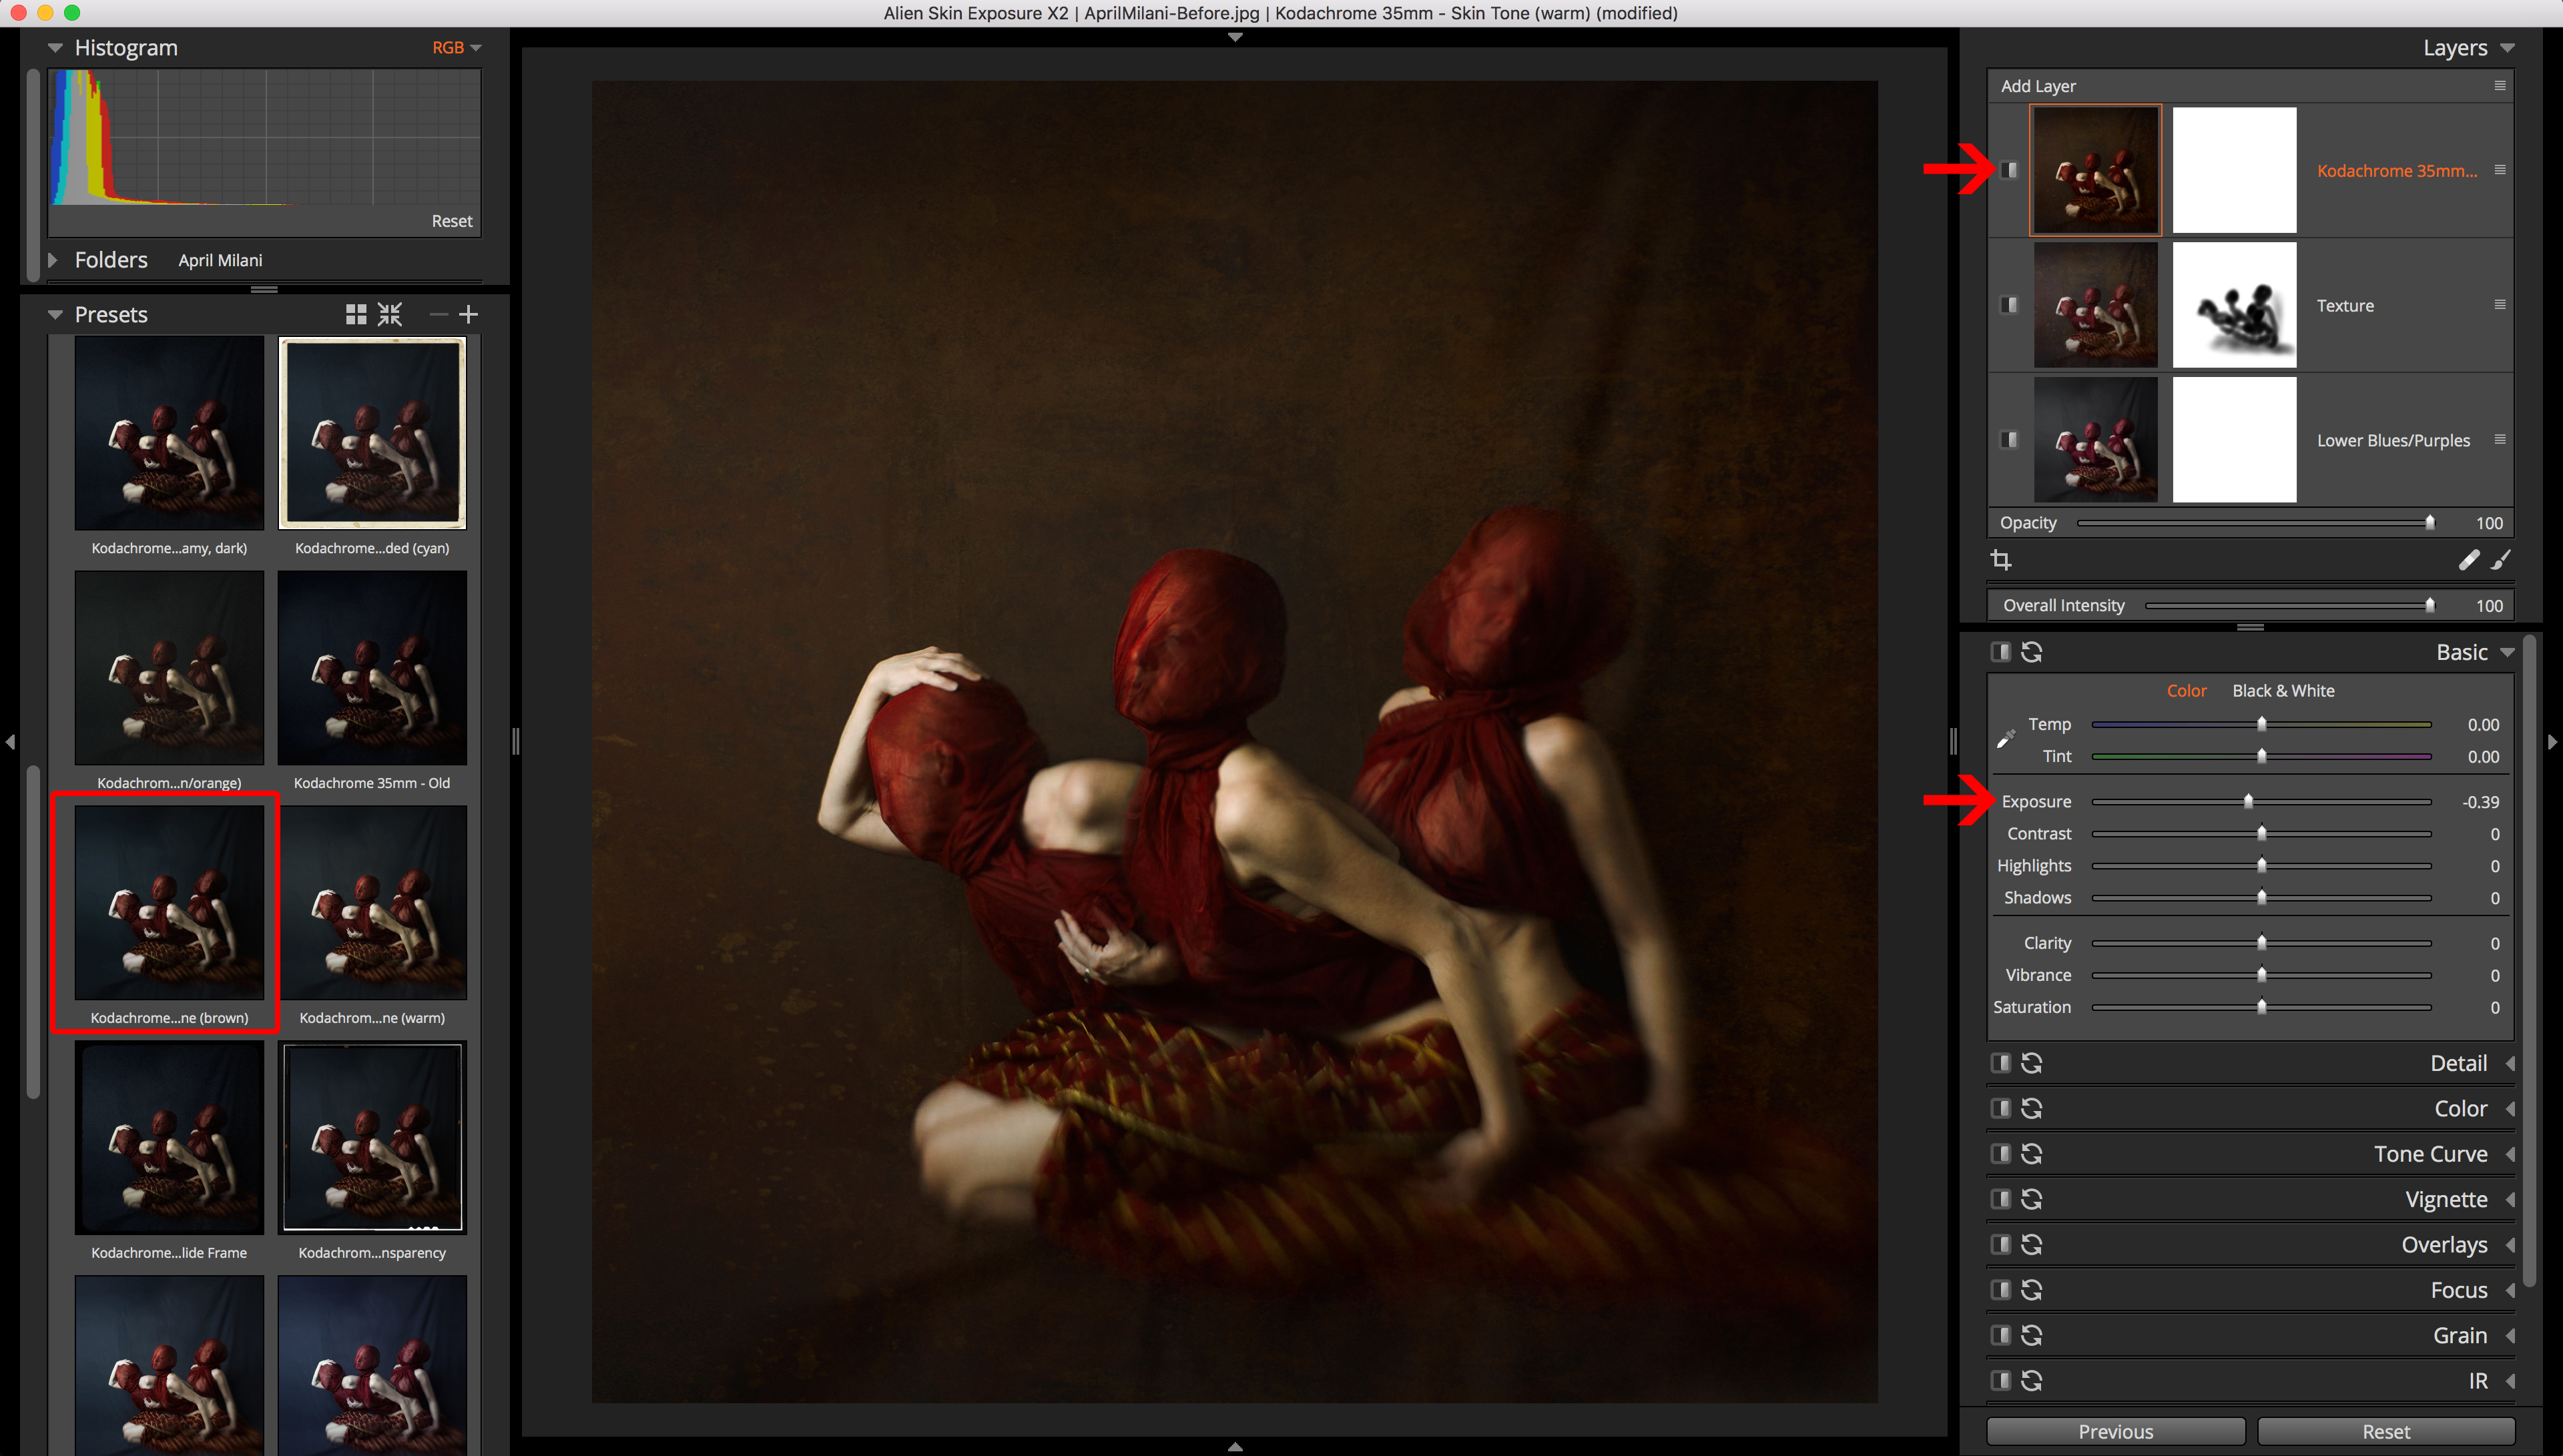
Exposure’s Kodachrome preset adds a warm brown look to April’s photo. Click image to view the settings at a larger size.
If you look through my portfolio and on my website, there is not a single photo that hasn’t been edited using Exposure. The program is deeply integrated in my artistic workflow. All of my work involves the use of it.
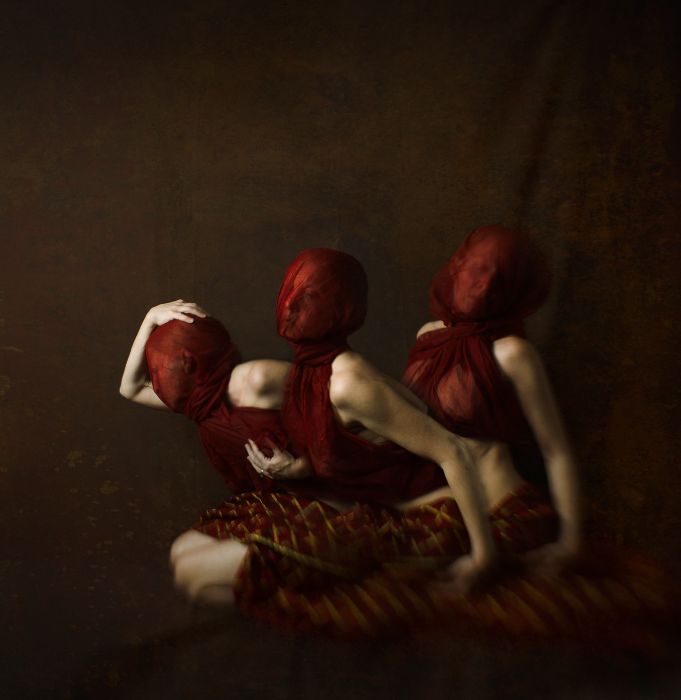
Exposure provides all the creative tools you need to create beautiful images. April Milani used texture overlays, brushing, and layers while editing this photo.
–
Thanks for sharing your workflow with us, April. See more of her work on her website, or follow her on Facebook or Instagram.
In addition to being a photographer, April teaches several photography workshops. Her Learn to bend your vision workshop teaches how to shoot using Lensbaby optics. Her Take control workshop teaches you how to master shooting in manual mode. And she has more workshops coming soon.
Try Exposure Today


Lovely work here. Would love to see some live tutorials using Exposure X2. I still seem to struggle, when it comes to adding different pre sets to images. Then masking off the effect, from parts of the image.
Hi Allan,
Thanks for commenting. I’m sorry to hear that you’re having trouble using Exposure’s layers and brush tool. Our Exposure X2 Non-destructive Layers tutorial video demonstrates the layer and brushing workflow in detail. Have you watched that?
I used to be able to overlay an entire image without using a brush. How can I get AS to go back to that setting. It’s much faster and less taxing on my wrists than having to brush an entire image.
Thanks for commenting.
You don’t have to use the brushing to apply effects. Simply open the Overlays panel and select a texture to place it on your photo. If you’re not seeing it, I suspect the mask is hiding the layer. In the Layers panel, if the mask is white, the effect on that layer will be displayed at full strength. If the mask is black, the effect is hidden.
Check out our nondestructive layers video to learn more about how layers and layer masks work in Exposure.